

Homemade yogurt tastes better than anything from a tub, costs far less, and takes only about fifteen minutes of actual work. If you have ever wondered how to make yogurt at home, the answer is simpler than you think: warm milk, a spoonful of live yogurt as a starter, and a few quiet hours in a warm spot. That is really all there is to it. No special machine, no fancy ingredients, and no cooking experience needed.
Learning how to make yogurt from milk is one of those small kitchen skills that pays off every single day. A litre of milk turns into a litre of fresh yogurt, ready for breakfast bowls, smoothies, marinades, and raita. Once you get the basic method right, you can make batch after batch from your own previous yogurt, so you may never need to buy a starter again.
What You Need to Make Yogurt at Home
You do not need any special equipment. Here is the short list:
- 1 litre of whole milk (full-fat milk gives the thickest, creamiest result)
- 2 tablespoons of plain yogurt with live cultures, as the starter
- A heavy saucepan
- A clean glass jar or container with a lid
- A thermometer (helpful, but not essential)
- A towel or blanket to keep the jar warm
For the starter, use plain, unsweetened yogurt that says “live active cultures” on the label. A small pot of good-quality shop-bought yogurt works perfectly for your first batch. After that, you can save two tablespoons from each batch to start the next one.
How to Make Yogurt at Home: Step by Step
Step 1: Heat the milk. Pour the milk into a saucepan and heat it gently over medium heat, stirring now and then so it does not catch on the bottom. Bring it to around 82°C (180°F) — just below boiling, when small bubbles appear around the edges and steam rises. This step changes the milk proteins so the yogurt sets thick instead of runny. Do not let it boil over.
Step 2: Cool the milk. Take the pan off the heat and let the milk cool to about 43–46°C (110–115°F). It should feel comfortably warm on the inside of your wrist, like warm bath water. If you have a thermometer, use it — milk that is too hot will kill the live cultures, and milk that is too cool will not set properly. Cooling usually takes 20 to 30 minutes.
Step 3: Stir in the starter. Put the two tablespoons of starter yogurt in a small bowl and whisk in a few spoonfuls of the warm milk until smooth. Then stir this mixture back into the rest of the milk. Mixing the starter this way, instead of dropping it straight into the pan, spreads the cultures evenly and avoids lumps.
Step 4: Keep it warm and wait. Pour the milk into your clean jar, put the lid on, and wrap the jar in a towel. Place it somewhere warm and still — inside an oven with just the light on, in a microwave that is switched off, or in a warm corner of the kitchen. Leave it completely undisturbed for 6 to 8 hours. The live cultures need steady warmth to turn the milk into yogurt, so try not to move or shake the jar while it sets.
Step 5: Chill and enjoy. After 6 to 8 hours, the yogurt should be set — it will wobble gently as one piece when you tilt the jar, like a soft jelly. Put it in the fridge for at least 3 to 4 hours before eating. Chilling firms it up and gives it that clean, mild flavour. Your homemade yogurt will keep in the fridge for up to a week.
How to Make Yogurt Thicker
If your first batch comes out thinner than you would like, do not worry — thickness is easy to fix. The most reliable trick is to use whole milk rather than skimmed or semi-skimmed, because fat is what gives yogurt its body. Heating the milk properly and holding it at temperature for a few minutes also helps, as does letting the yogurt set for the full 8 hours instead of rushing it.
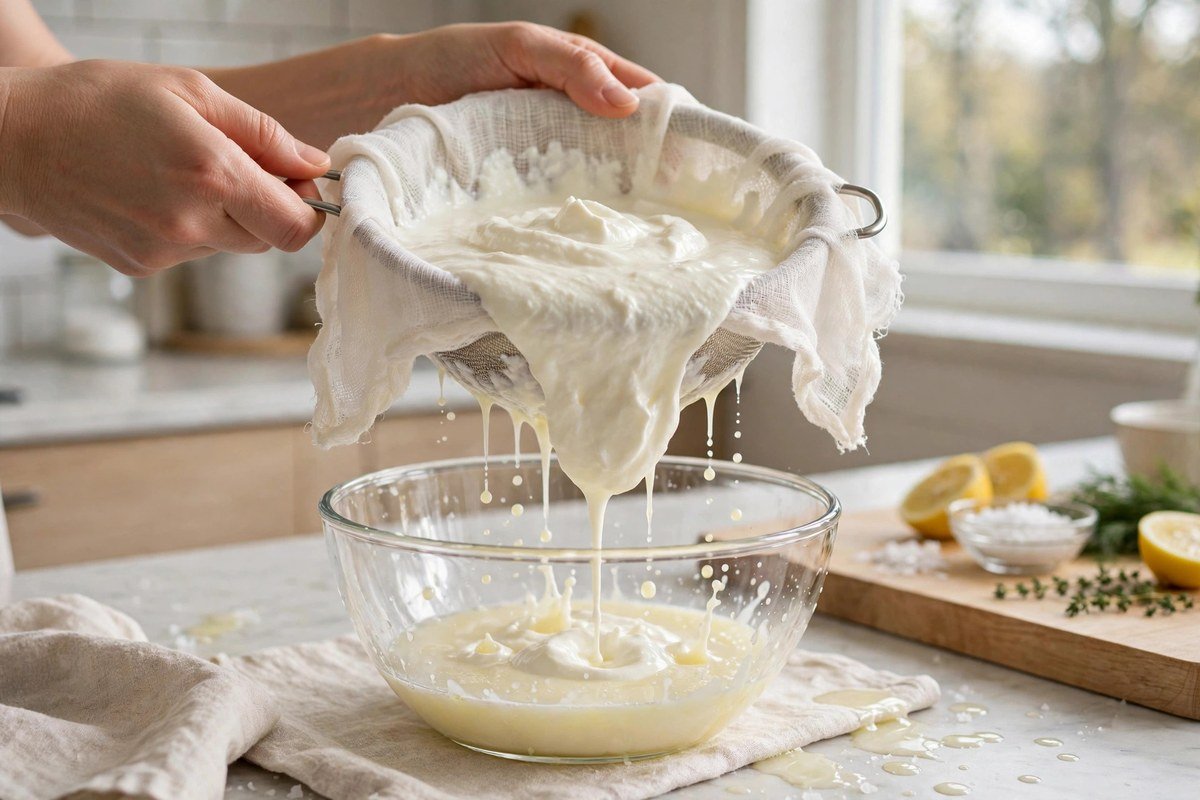
Another simple way to learn how to make yogurt thicker is to strain it. Line a sieve with a clean muslin cloth or a coffee filter, set it over a bowl, and let the yogurt drain in the fridge for 1 to 2 hours. The whey drips away and leaves beautifully thick yogurt behind. The longer you strain it, the thicker it gets — and that strained yogurt is exactly what Greek yogurt is.
How to Make Greek Yogurt at Home
Once your plain yogurt is ready and chilled, you can turn half the batch into Greek yogurt with one extra step. Spoon the yogurt into a cloth-lined sieve over a deep bowl and leave it in the fridge for 3 to 4 hours. The liquid whey collects in the bowl below, while the yogurt in the cloth becomes wonderfully thick, rich, and creamy.
Learning how to make greek yogurt at home is worth it if you love a spoonable, high-protein yogurt for breakfast or desserts. Do not throw the whey away — it is full of nutrients and works well in smoothies, bread dough, or as a tangy addition to soups and curries.
How to Make Curd at Home
In many Indian kitchens, the same process has a familiar name: curd. If you are wondering how to make curd at home, the method is almost identical — warm milk, a spoonful of yesterday’s curd as the starter, and a warm spot to set overnight. The main difference is the culture itself: curd is usually set with a small amount of previous curd and left in a warm place, often overnight, giving it a slightly tangier taste than the milder yogurt made with a shop-bought starter.
Either way, the rules are the same. Warm the milk, cool it to wrist-warm, stir in the starter, and leave it undisturbed. In summer, curd sets in 4 to 6 hours; in winter, it may need 8 to 10 hours, or a warmer corner of the kitchen. If you eat curd regularly, you may enjoy reading about the benefits of eating curd daily — a simple habit that fits easily into a healthy routine.
Why Your Yogurt Did Not Set (and How to Fix It)
Most yogurt failures have a simple cause. If the yogurt is still liquid after 8 hours, the milk was probably too hot when the starter went in, or the jar cooled down too much during setting. You can rescue it by warming the milk again gently to wrist temperature, stirring in a fresh spoonful of starter, and giving it another 6 hours in a warmer spot.
If the yogurt tastes too sour, it was left to set for too long or kept too warm. Next time, check it after 6 hours and move it to the fridge as soon as it sets. If it tastes odd or smells unpleasant, throw it away and start fresh with a new starter — it is not worth the risk.
A thin layer of liquid on top is completely normal. That is whey, and you can simply stir it back in or pour it off, whichever you prefer.
Storing and Serving Your Homemade Yogurt
Store your yogurt in a clean, covered container in the fridge and use it within a week. Always save two tablespoons before you finish the batch — that is your starter for the next one, and a healthy starter can be carried forward for months.
Homemade yogurt is endlessly useful. Eat it with honey and fruit, blend it into smoothies, use it to marinate chicken, stir it into soups, or serve it alongside spicy food. It is fresher, cheaper, and free of the added sugars and thickeners found in many shop-bought tubs.
The Bottom Line
Now you know how to make yogurt at home, and you can see how little it really takes: milk, a spoonful of starter, warmth, and patience. Make your first batch this weekend, keep a little back as your starter, and you will have fresh, thick, creamy yogurt in your fridge all week — made exactly the way you like it.